# Reimbursement
The reimbursement feature helps manage reimbursement items and is suitable for scenarios such as company expenses, business trips, team-building expenses, etc.
# I. Opening the Reimbursement Feature
Navigate to iCost Settings -> Reimbursement Settings -> Enable Reimbursement.
# II. Marking as To Be Reimbursed
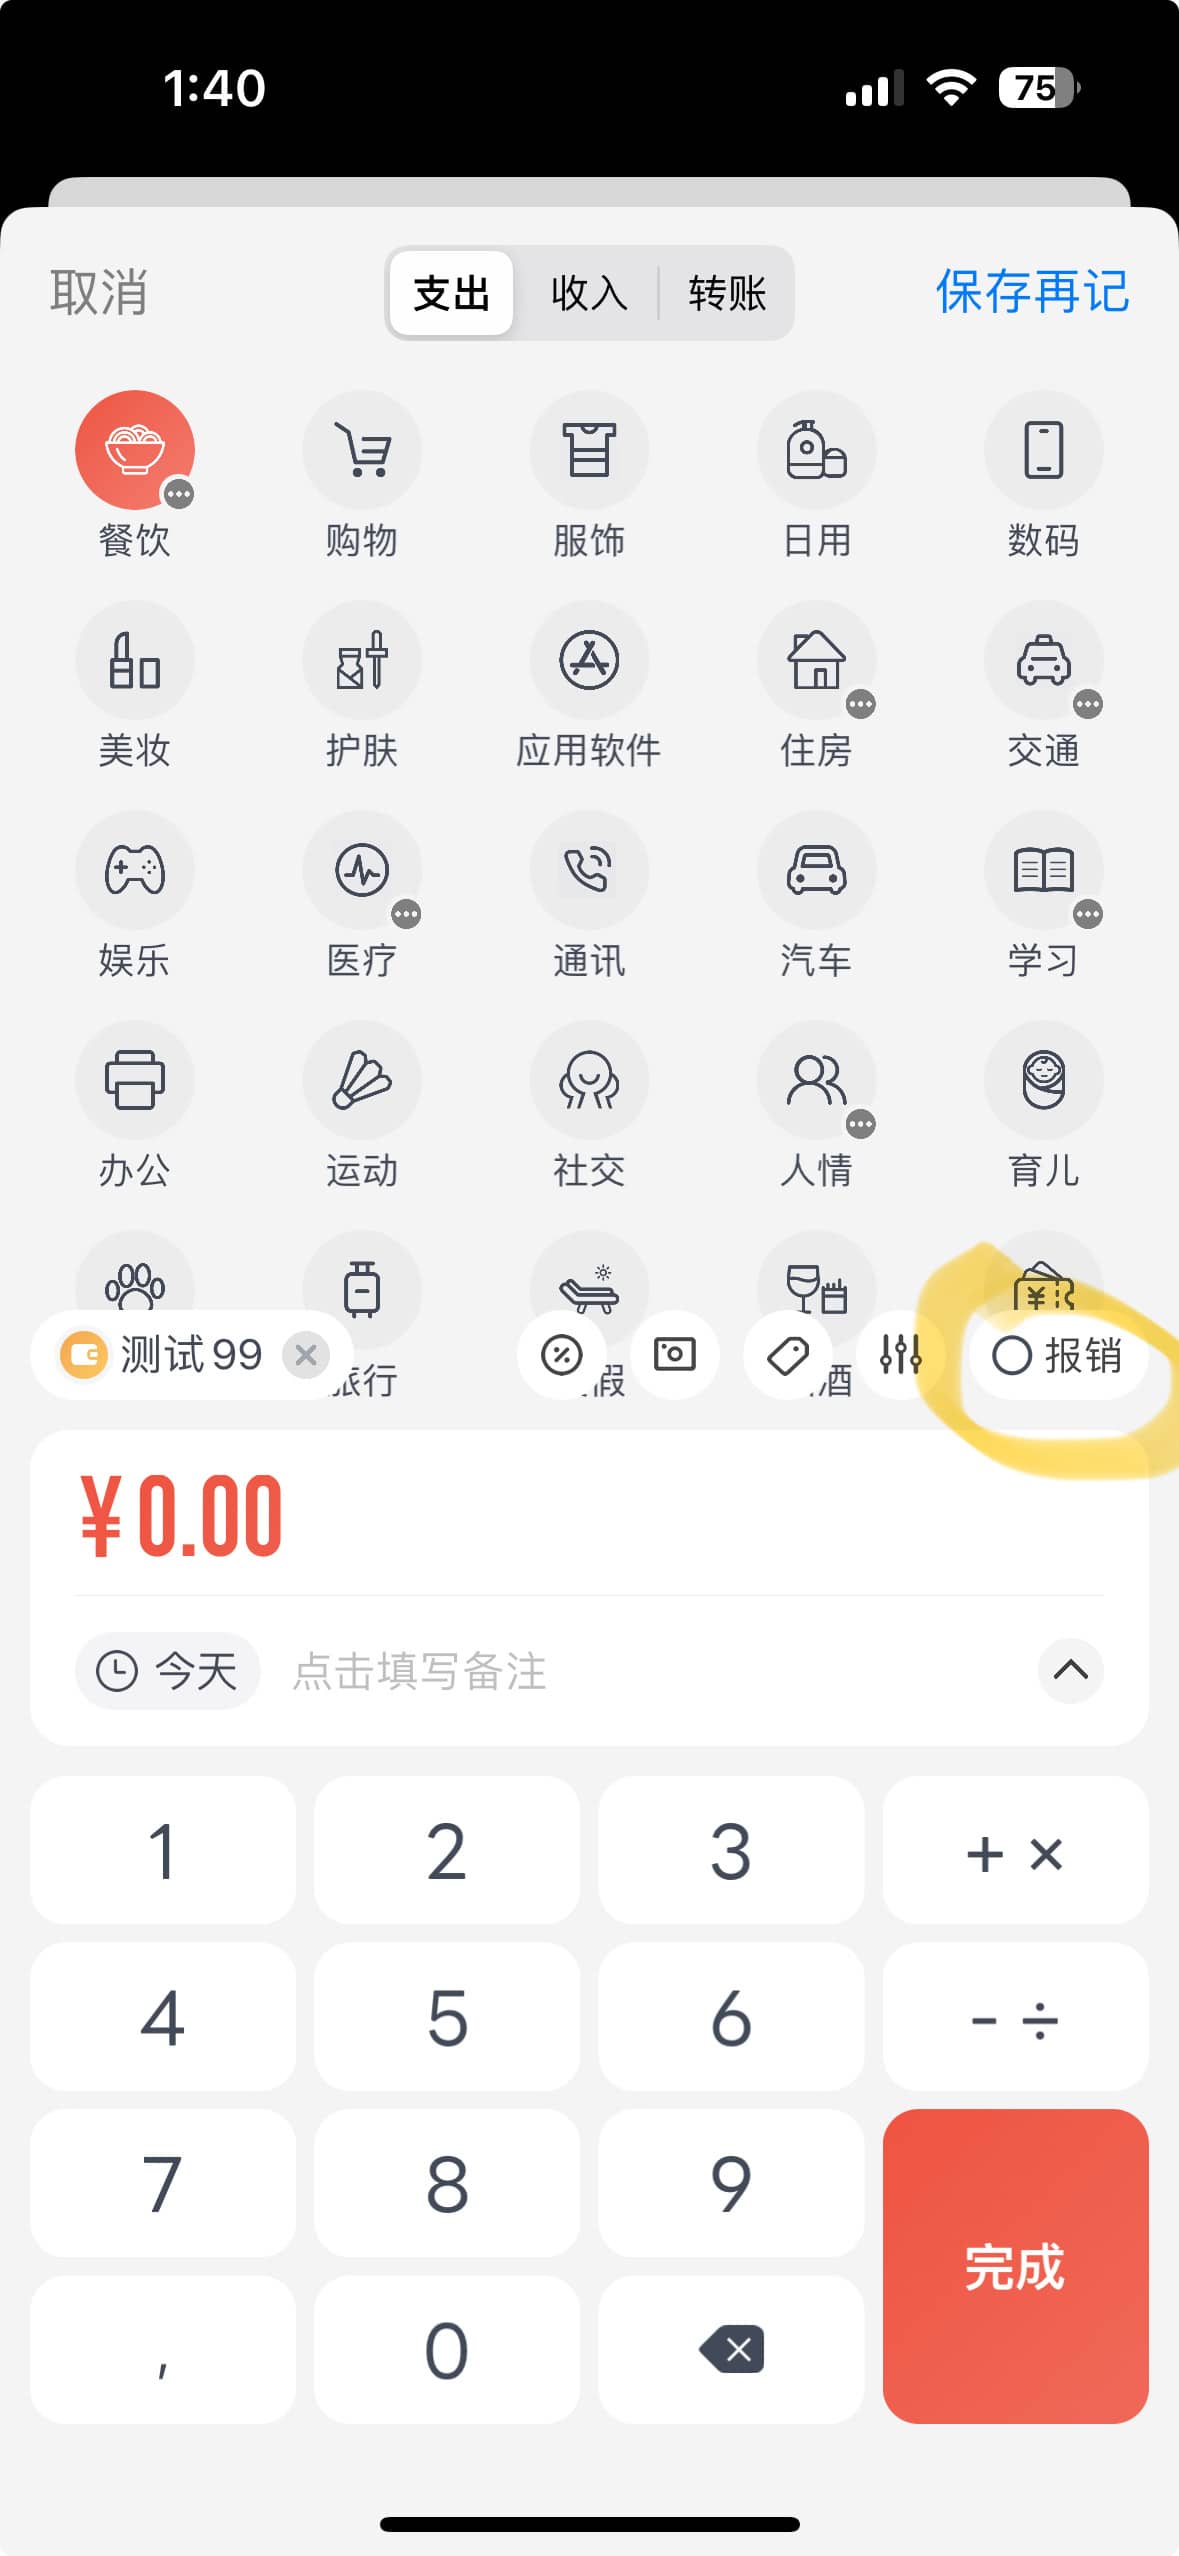
After enabling the reimbursement feature, a reimbursement option will appear when adding a bill. Each time a new expense bill is created, you can choose to mark it as "To Be Reimbursed". This bill will then appear in the pending reimbursement section of the reimbursement management.
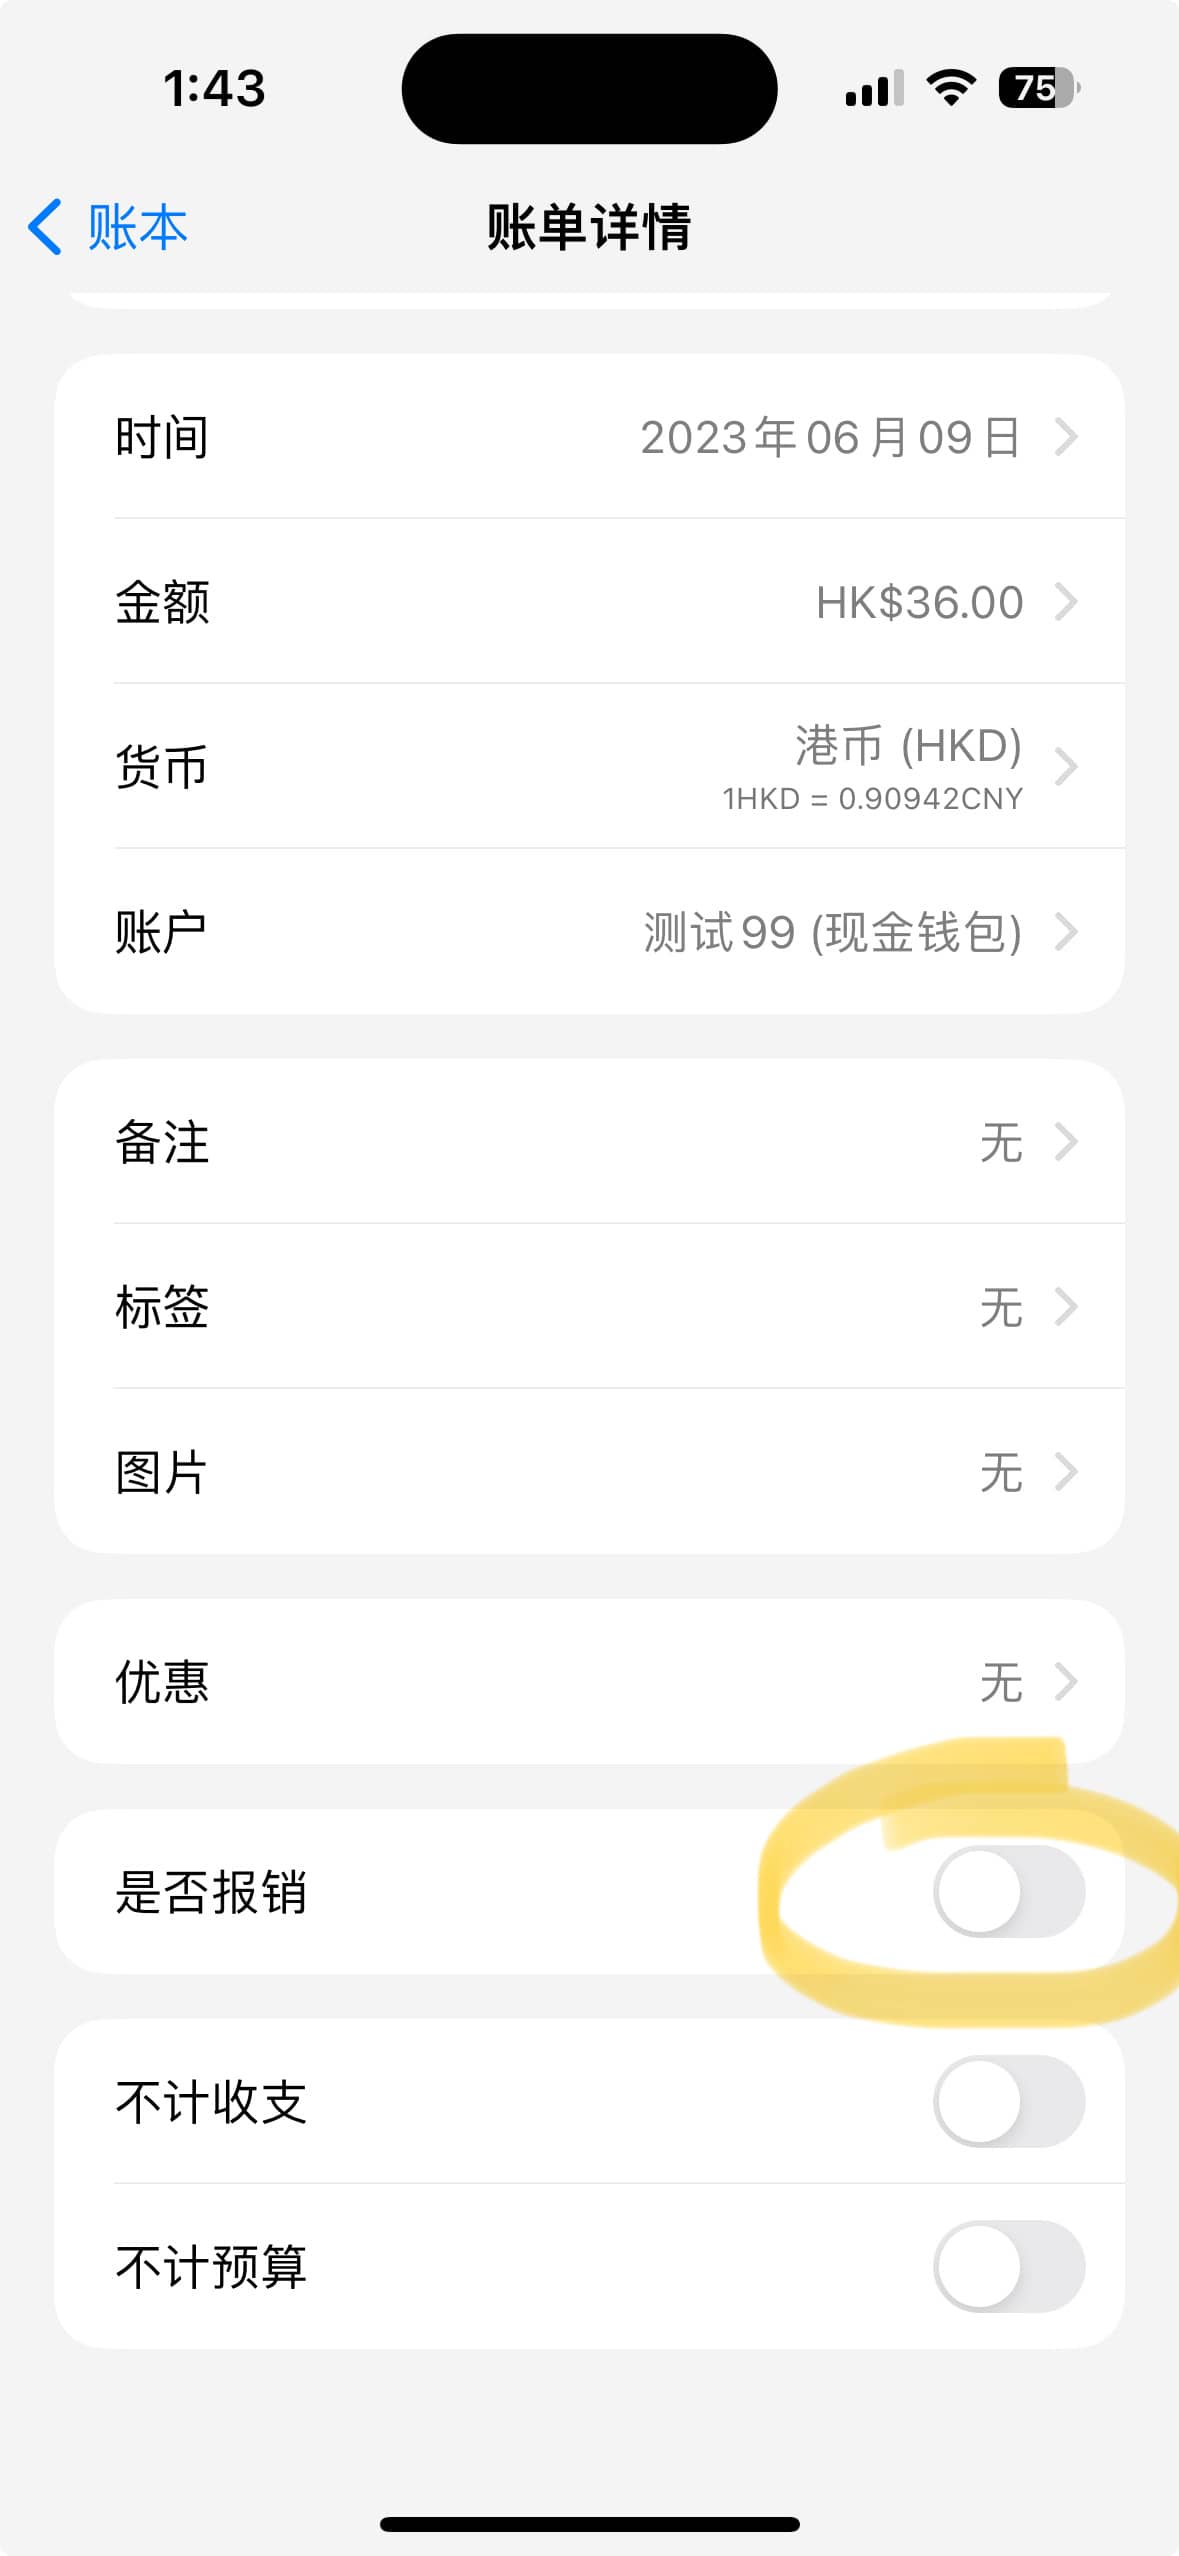
You can also mark a bill as "To Be Reimbursed" in the bill details page.
# III. Reimbursing Bills
Go to Settings -> Reimbursement Feature -> Reimbursement Management.
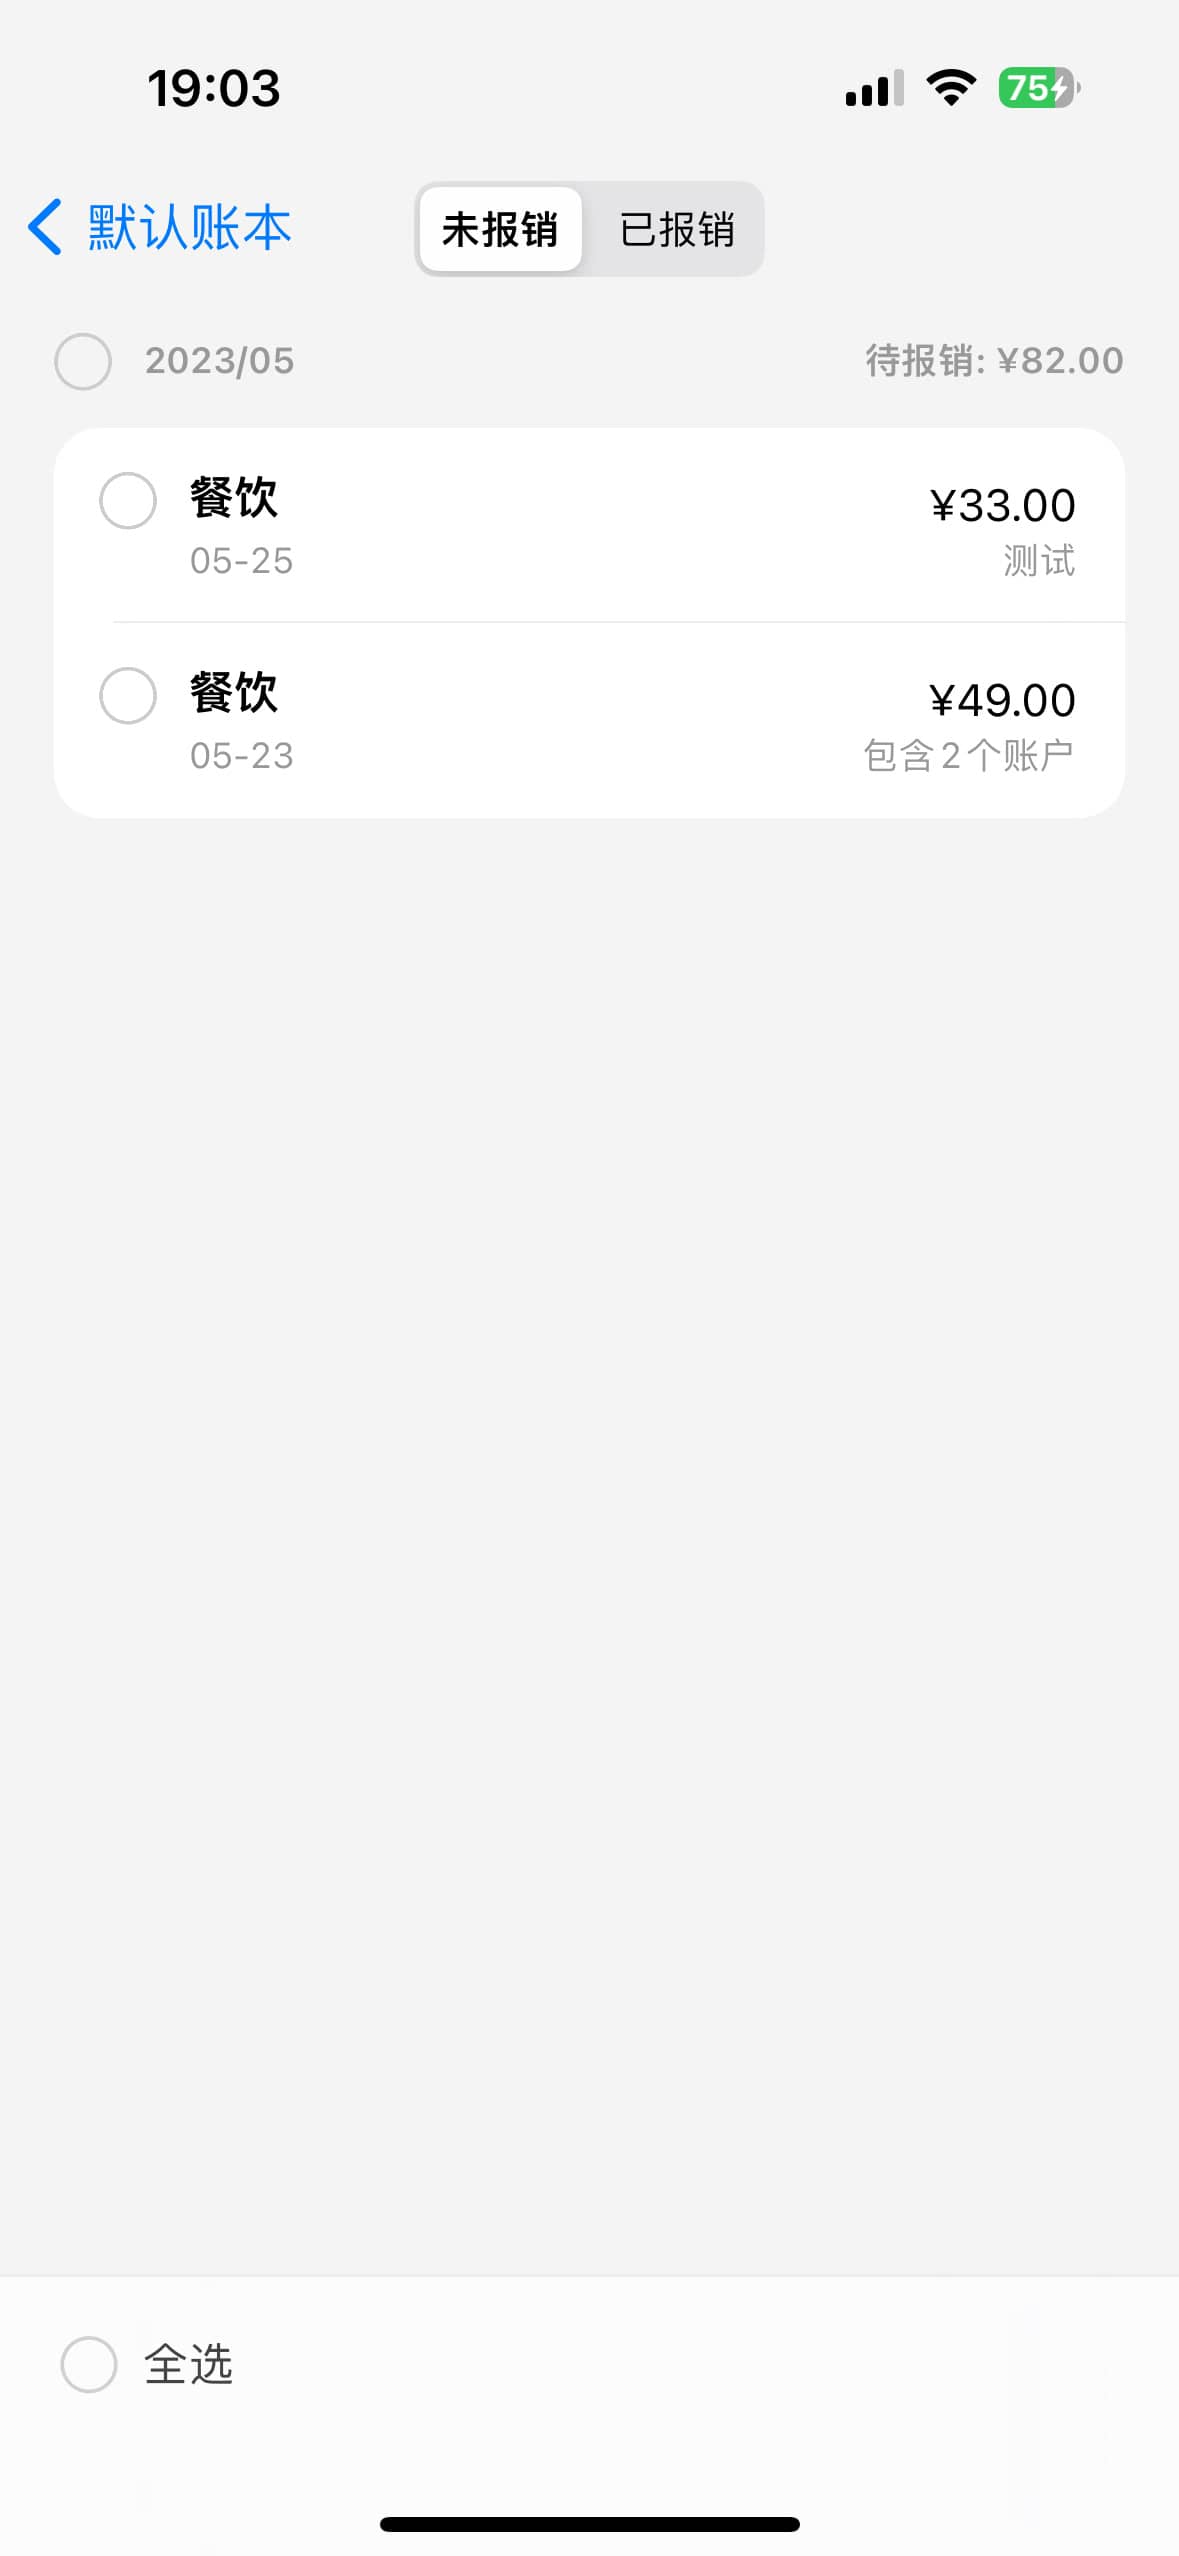
Select the corresponding bill to enter the reimbursement process. You can choose a custom amount and reimbursement date.
The reimbursement date ranges from the original bill's creation time to the current time. It's important to note that if the custom amount entered is less than the amount to be reimbursed, a prompt option will appear:
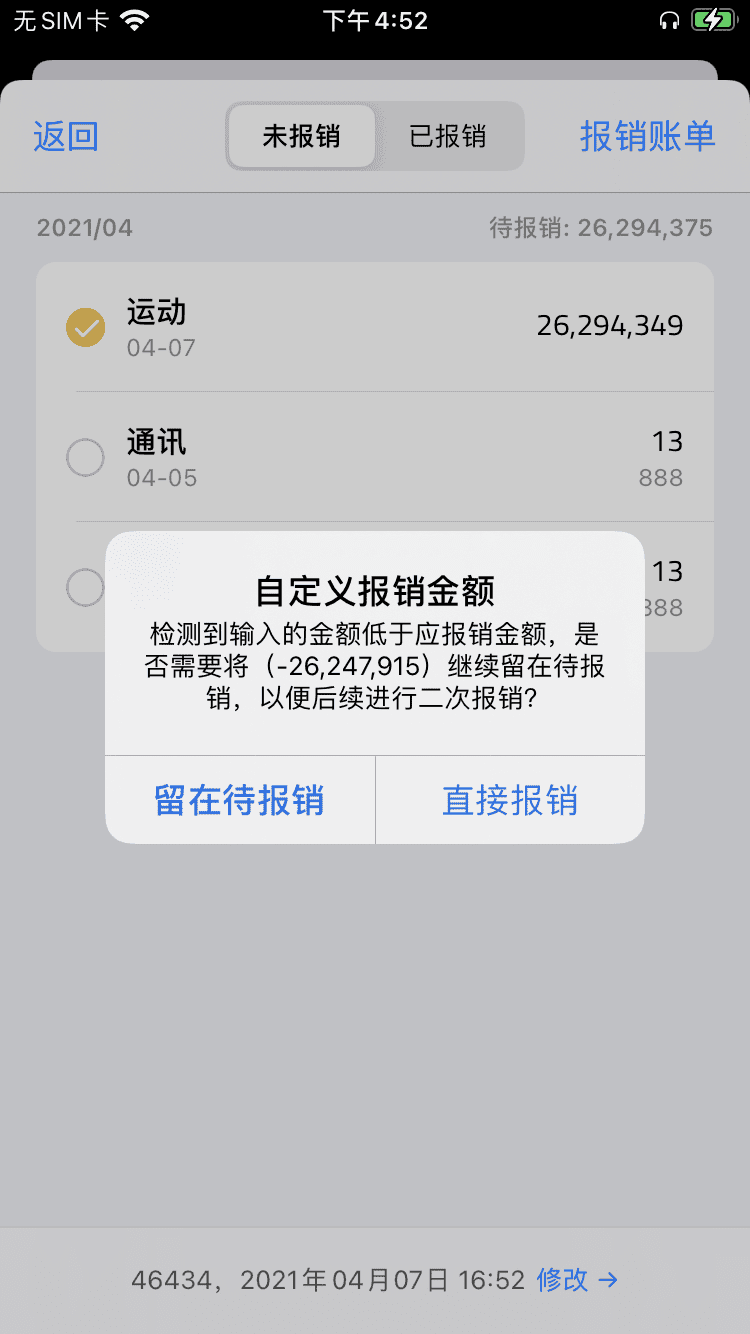
If you choose to "Stay in To Be Reimbursed", the system will split the bill into two, leaving the difference for future reimbursement. If you choose "Direct Reimbursement", the system will directly generate an expense bill to cover the middle difference.
If the custom amount entered exceeds the original bill's amount, a direct income bill will be generated, following the same principles as above.
# IV. New Reimbursement Entry Points
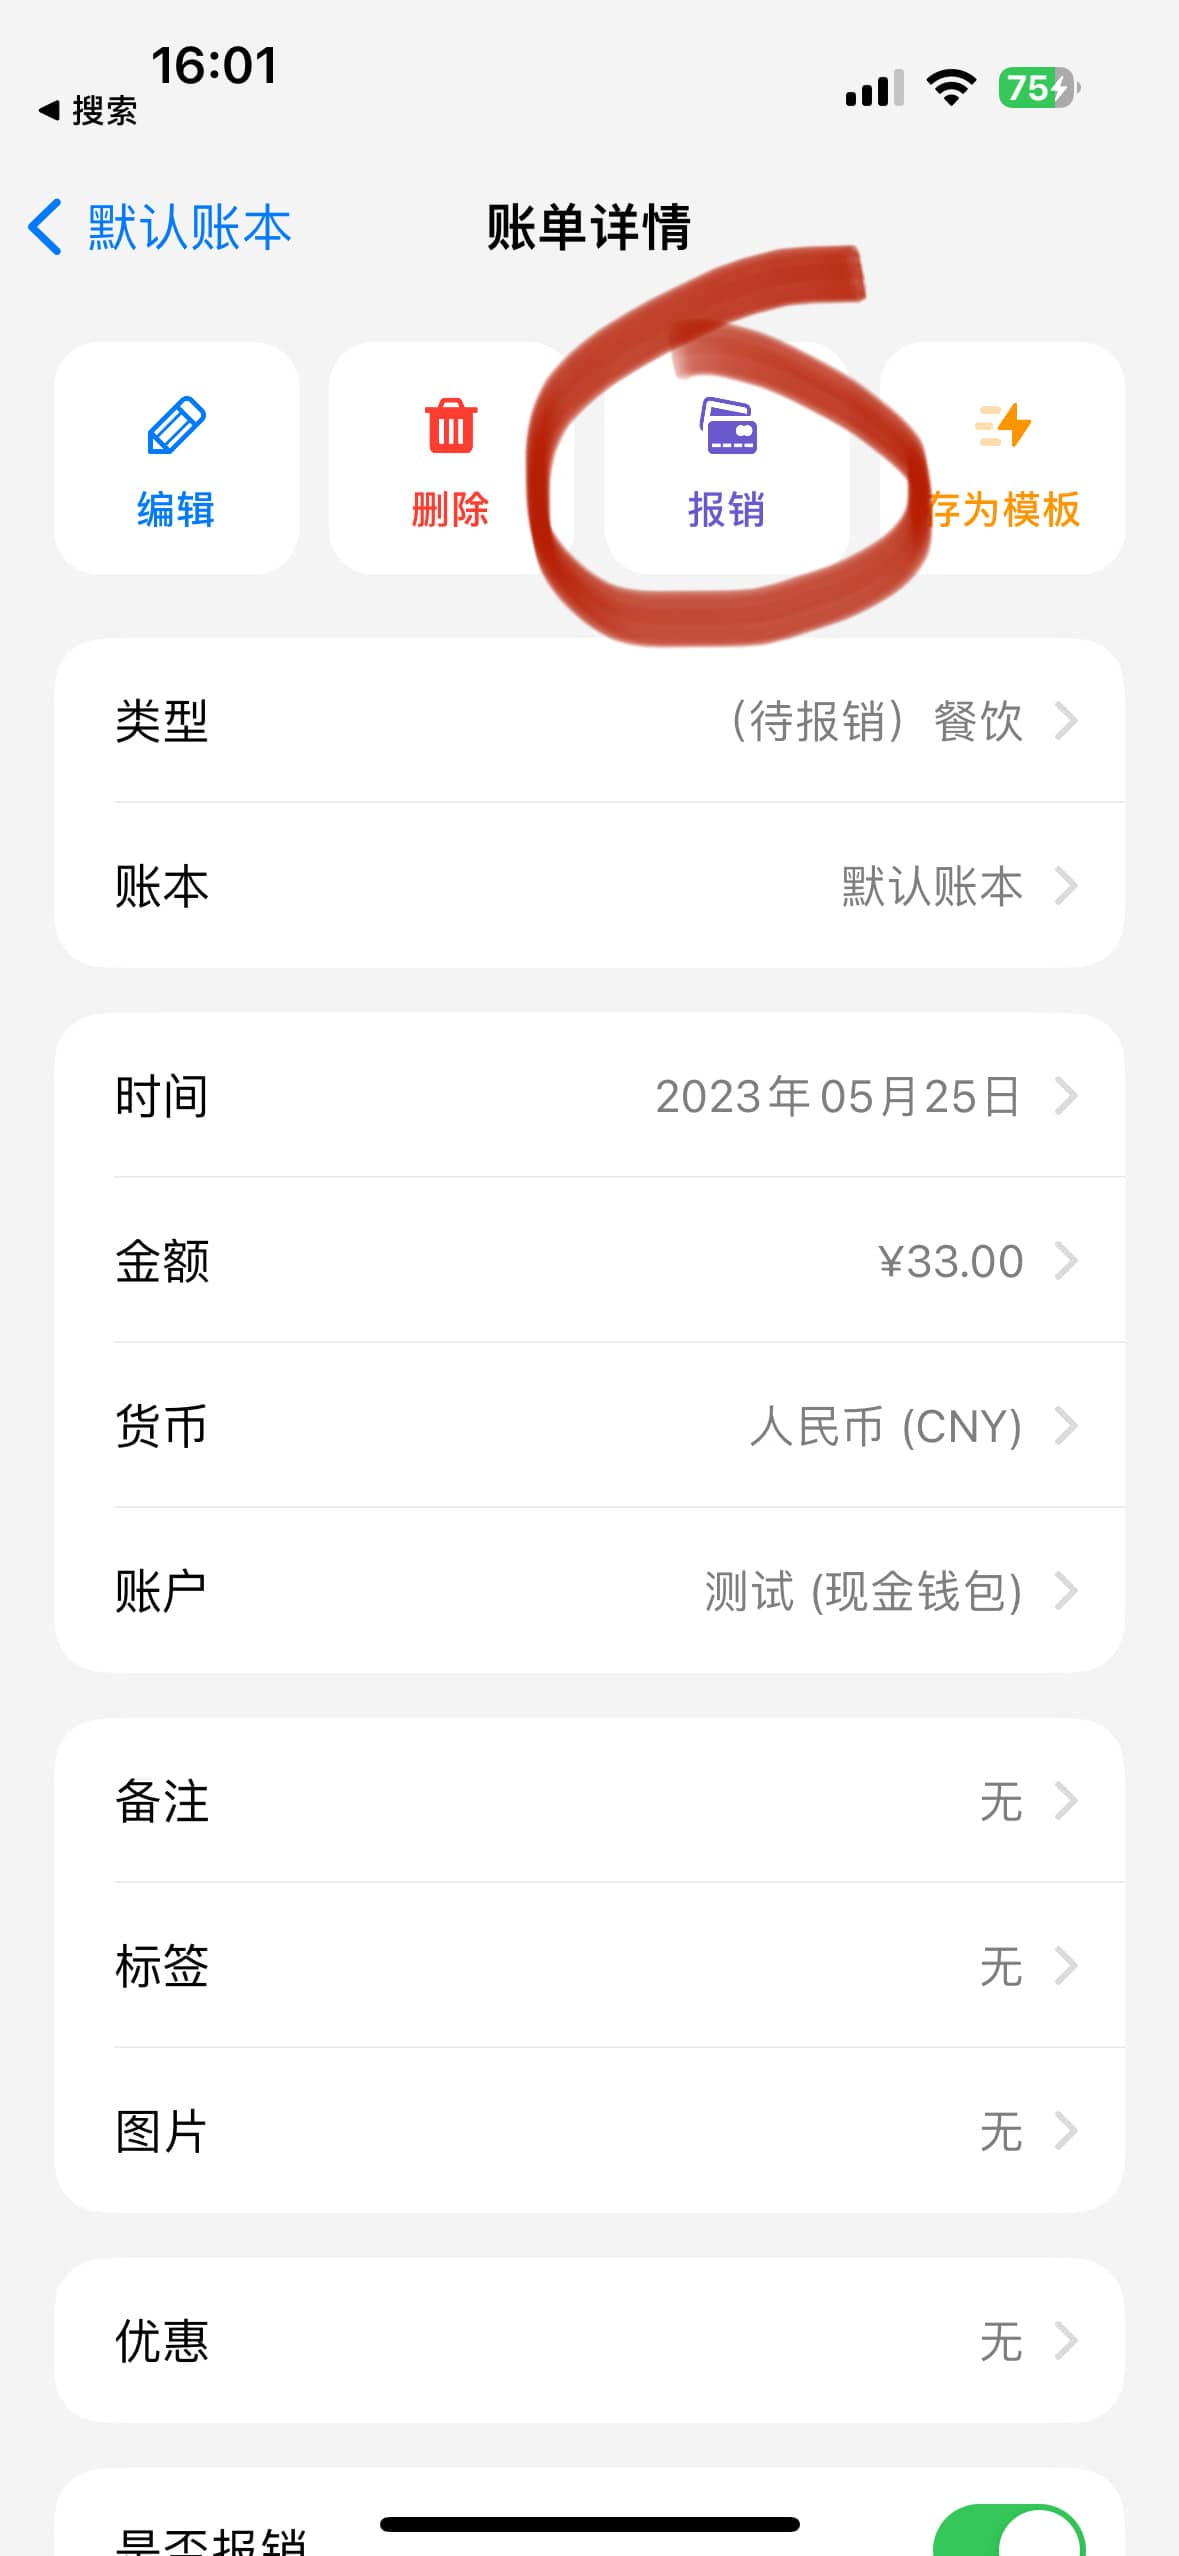
- Swipe the bill to the left and select "Reimburse".
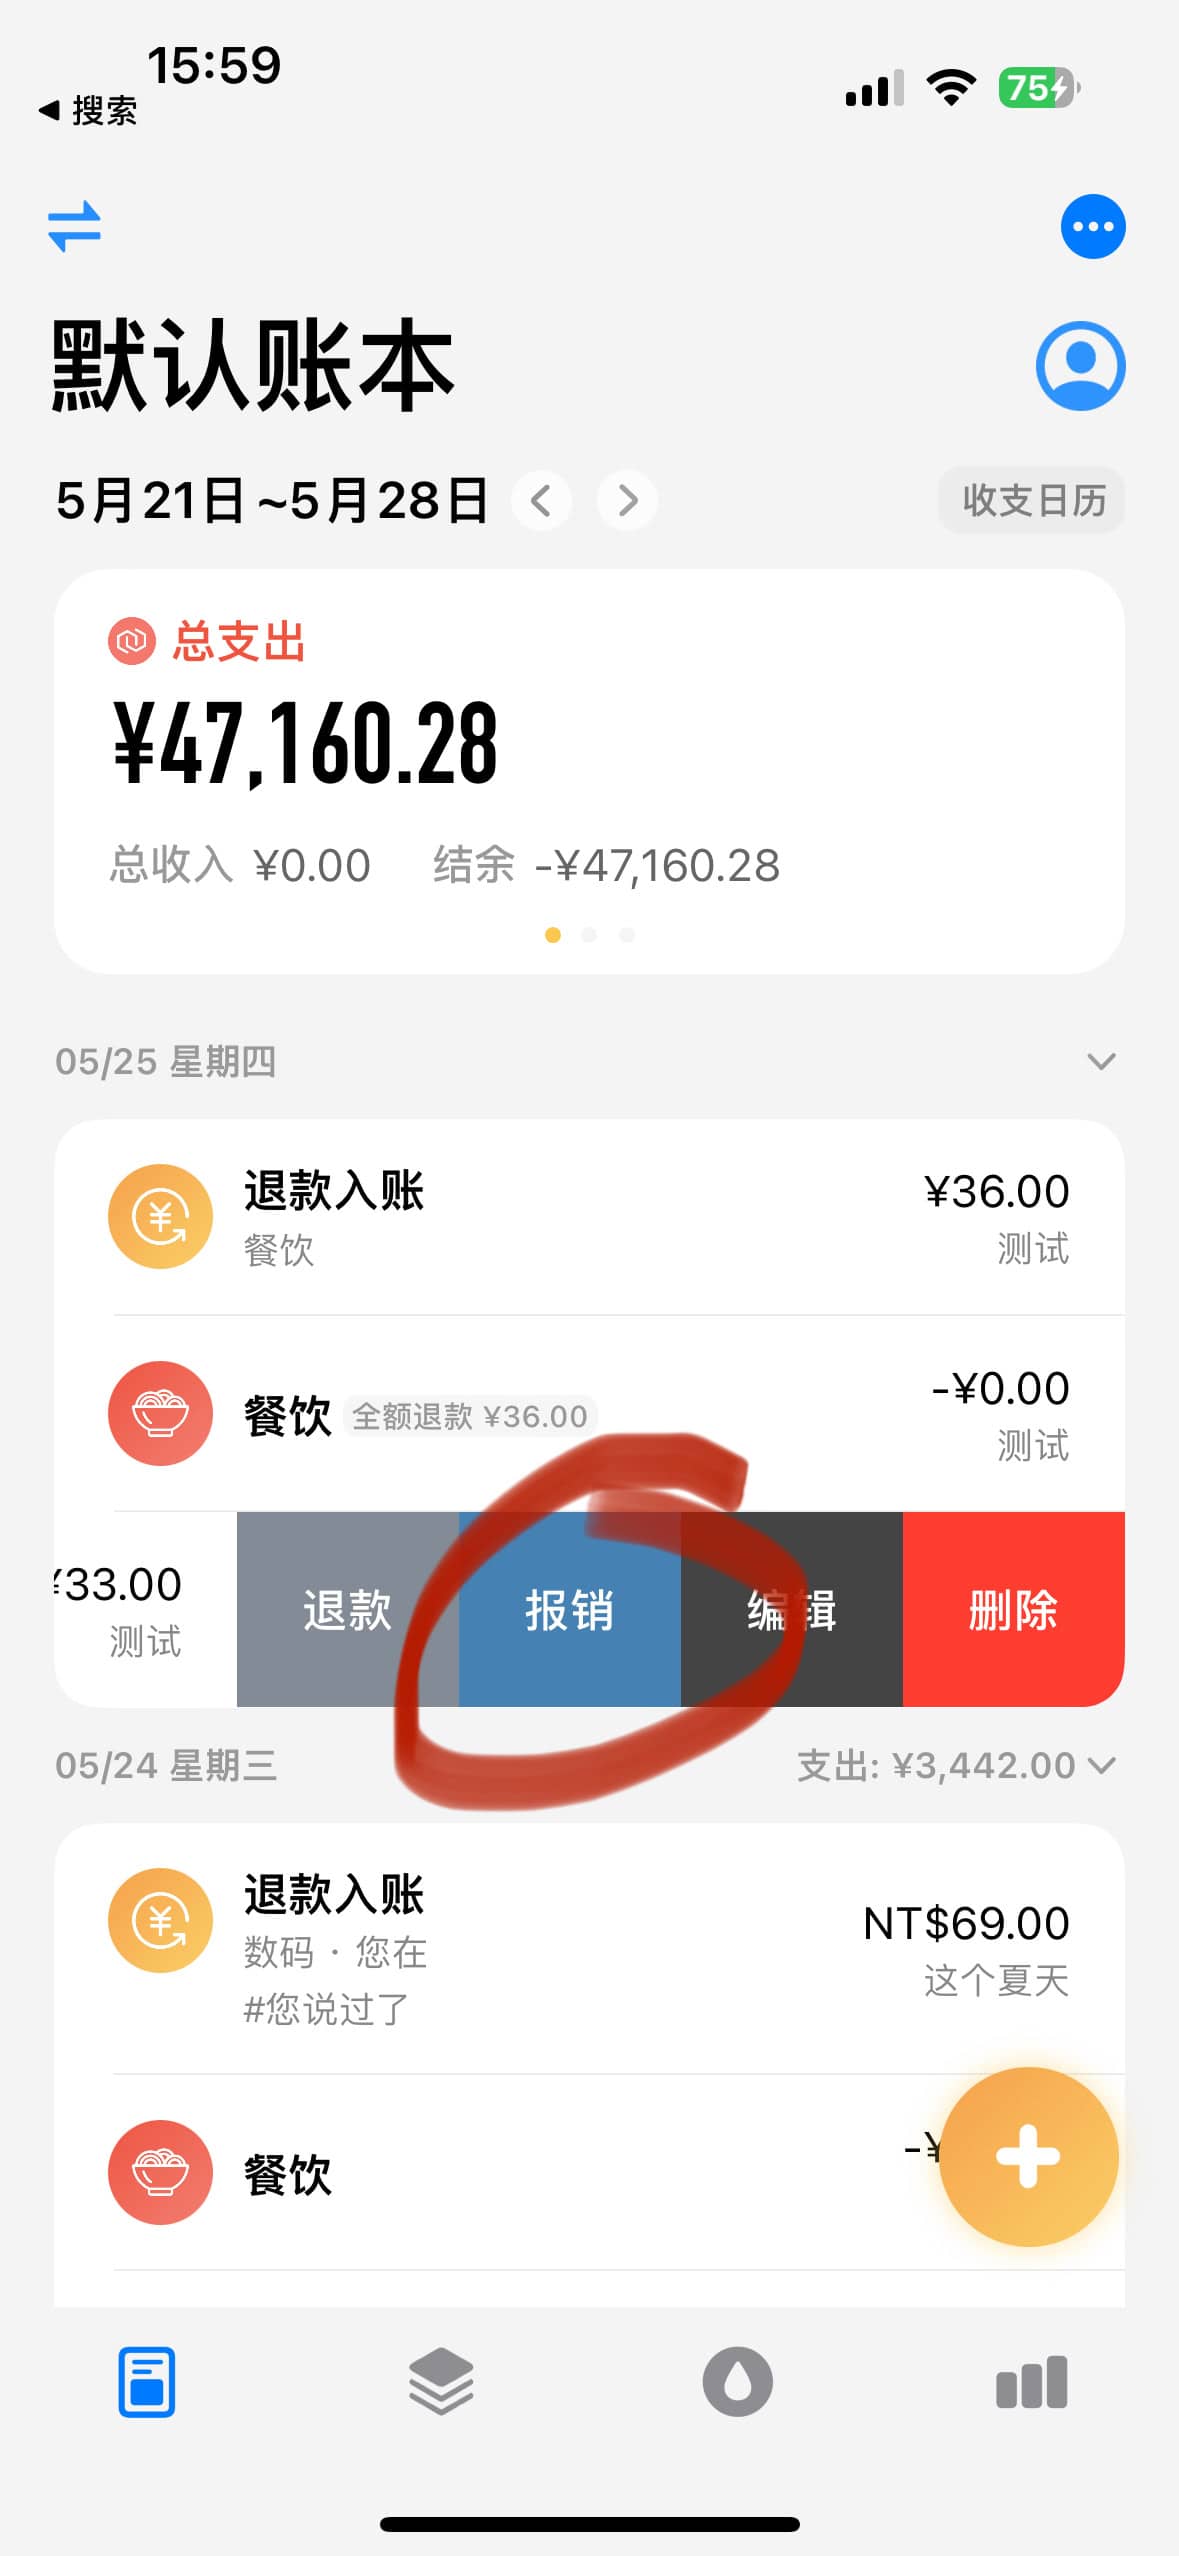
- Enter the bill details and select "Reimburse".
